
Take your baby out to the ball game – in style
You want to learn how to turn a children’s hand-me down T-shirts into a new fun an Orioles T-shirt baby bib? What better way to raise that baby cheering for the O’s.
Your baby can be a Orioles fan and make a fashion statement at the same time. Everyone needs some new swag for game day even a baby.
 I got the idea out of this great book called Generation T 120 new ways to transform a T-shirt. The book shows you how to do it with out any sewing. But I really like using the sewing machine because it gives it a more finished and cleaner look. I also use material such as ribbons and buttons and other fun and colorful stuff to dress it up in style. So let’s get swaggin’.
What You Will Need
- T-shirt
- Scissors
- Chalk or Pencil (for outline)
- Ribbon/or Velcro (optional)
- Iron (optional )
- Sewing Machine
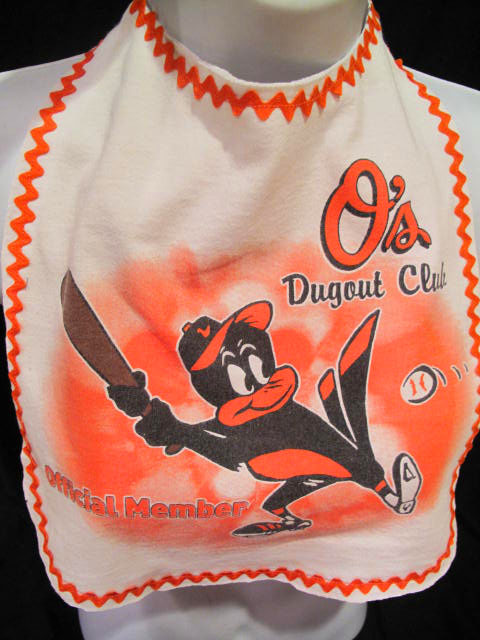
- Example/Picture of bib
Things to know
It’s easiest to use a children’s T-shirt because the graphic will be the right size. You can use any size shirt as long as you are OK with cutting it down or cutting into the graphic. You can make the bib square or round, long or short. It’s up to you and your baby. Keep in mind these make really great presents and it’s a great way to recycle unwanted or damaged clothing.
You can just use the side of the T-shirt with the graphic but I like to use both sides of the T-shirt. The double layer uses up more material and makes it more durable. If you do use both sides I suggest ironing the shirt first. This will help prevent bubbling and bunching of the fabric when you go to sew the sides together.
So follow these steps to make that perfect Oriole’s bib.
 STEP 1. Outline
You can use the neck of the T-shirt as the base and start outlining from there. Or you can make your own pattern from a picture or bib you already have. With your pencil or chalk draw the desired outline directly onto the shirt. Make sure you like the size and shape by holding it up against yourself or some one to make sure it sits right. Remember it needs to be pretty snug against the neck to be functional.
STEP 2. Cutting
If you are using a sewing machine it might be helpful to put a few pins in on the inside of the outline to keep the T-shirt in place. Or you can just cut and sew and make adjustments as you go. Once you have cut out your bib if you are not sewing anything you are done. If the neck of the T-shirt is too small or too big to leave intact, cut it in the back and tie and until to take on and off. You can use Velcro if neck ties are wider and more custom fit. 
 STEP 3. Sewing
Make sure you have the right color thread and bobbin. It’s a good idea to keep a piece of scrap fabric around to test the thread tension. Sew slowly and safely to insure the best out come.
The hardest part for me is the sewing rounded corners. Don’t be afraid to rip out mistakes and start over but also don’t obsess and fuss. After all it is just a T- shirt bib that is going to be drooled and spilled on. When you are done sewing you will have a bib ready to be use.But if you want to make it a little fancier read on.
STEP 4. Trimmings
As I mentioned earlier you can use Velcro on the back as ties to make it more secure. You can also use ribbon instead of T-shirt neck.
 You can add ribbon or lace or decorative trimming. You can also glue or sew buttons sequence gems and other things to bling it out. Keep in mind that when adding these things they should be secularly attached and well monitored so the baby is not in any harm of trying to consume them.
I usually love using ribbon but this is the first bib I have made and I thought I would keep it simple and durable.
Can’t wait to find a family that is in dire need of an Orioles baby bib so this one can be put to use. You know one who needs one, let me know. Go O’s!
Gwynne Davis is a blogger for her Earring/Jewelry business called Ear Candie. She is a recently certified Zumba teacher. She makes earrings out of just about anything. So keep an eye out for her fun blog posts & funky earrings.